steps for domain mode clustering for master and slave in wildfly18
Steps For Domain Mode And Clustering for
Master and Slave In Wildfly18
Step 1:
First we should download WildFly 18 from the website:
After download finished, I got the zip file:
Then I unzipped the package to master and try to make a test run:
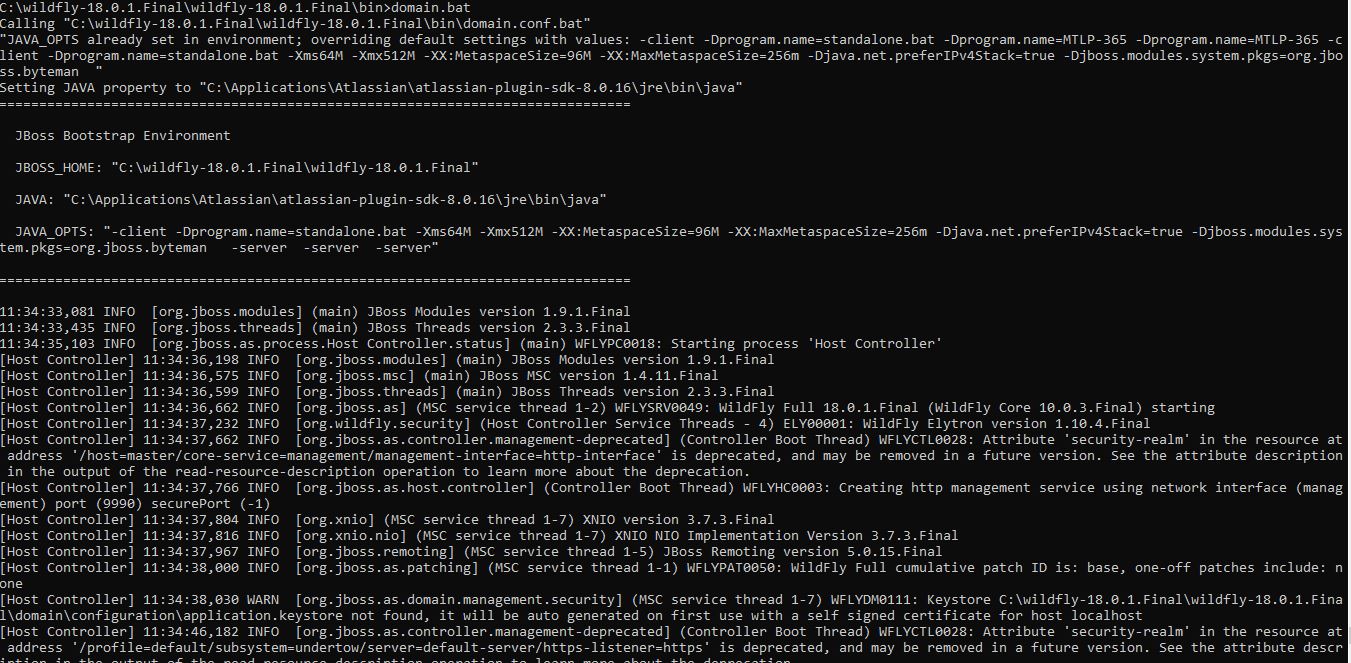
First goto the /bin directory and open the cmd prompt ,after that run the command like domain.bat in windows.
If everything ok we should see WildFly successfully startup in domain mode:
Admin Console be like below image after add the user for master..

Now exit master and let's repeat the same steps on slave host.
Finally we get WildFly 18 run on both master and slave, then we could move on to next step.
Finally we get WildFly 18 run on both master and slave, then we could move on to next step.
Step 2:
Interface config on master
First open the host.xml in master for editing:
domain/configuration/host.xml
The default settings for interface in this file is like:
<interfaces>
<interface name="management">
<inet-address value="${jboss.bind.address.management:127.0.0.1}"/>
</interface>
<interface name="public">
<inet-address value="${jboss.bind.address:127.0.0.1}"/>
</interface>
<interface name="unsecured">
<inet-address value="127.0.0.1" />
</interface>
</interfaces>
We need to change the address to the management interface so slave could connect to master.
The public interface allows the application to be accessed by non-local HTTP,
and the unsecured interface allows remote RMI access.
My master's ip address is 172.17.31.199, so I change the config to:
The public interface allows the application to be accessed by non-local HTTP,
and the unsecured interface allows remote RMI access.
My master's ip address is 172.17.31.199, so I change the config to:
<interfaces>
<interface name="management">
<inet-address value="${jboss.bind.address.management:172.17.31.199}"/>
</interface>
<interface name="public">
<inet-address value="${jboss.bind.address:172.17.31.199}"/>
</interface>
<interface name="unsecured">
<inet-address value="172.17.31.199" />
</interface>
</interfaces>
Step3:
Interface config on slave
Now we will setup interfaces on slave. Let's edit host.xml. Similar to the steps on master, open host.xml first:
domain/configuration/host.xml
The configuration we'll use on slave is a little bit different, because we need to let slave connect to master.
First we need to set the hostname. We change the name property from:
First we need to set the hostname. We change the name property from:
<host name="master" xmlns="urn:jboss:domain:3.0">
To
<host name="slave/whateveryouwant" xmlns="urn:jboss:domain:3.0">
Then we need to modify domain-controller section so slave can connect to master's management port:
<domain-controller>
<remote security-realm="ManagementRealm" username="ramya">
<discovery-options>
<static-discovery name="primary"
protocol="${jboss.domain.master.protocol:remote+http}"
host="172.17.31.199" port="${jboss.domain.master.port:9990}"/>
protocol="${jboss.domain.master.protocol:remote+http}"
host="172.17.31.199" port="${jboss.domain.master.port:9990}"/>
</discovery-options>
</remote>
</domain-controller>
As we know, 172.17.31.199 is the ip address of master.
Finally, we also need to configure interfaces section and expose the management ports to public address:
<interfaces>
<interface name="management">
<inet-address value="${jboss.bind.address.management:172.17.31.180}"/>
</interface>
<interface name="public">
<inet-address value="${jboss.bind.address:172.17.31.180}"/>
</interface>
<interface name="unsecured">
<inet-address value="172.17.31.180" />
</interface>
</interfaces>
172.17.31.180 is the IP address of the slave.
Refer to the domain controller configuration above for an explanation of the management,
public, and unsecured interfaces.
Refer to the domain controller configuration above for an explanation of the management,
public, and unsecured interfaces.
In bin directory there is a batch called add-user.bat,
we'll use it to add new users to the properties file used for domain management authentication:
we'll use it to add new users to the properties file used for domain management authentication:

To represent the user add the following to the server-identities definition
<secret value="cGFzc3cwcmQh" />
<secret value="cGFzc3cwcmQh" />
In slave we need to configure host.xml for authentication.
We should change the security-realms section as following:
We should change the security-realms section as following:
<server-identities>
<secret value="c3VkaGVlcg==" />
</server-identities>
Then in domain controller section we also need to add security-realm property:
<domain-controller>
<remote security-realm="ManagementRealm" username="ramya">
<discovery-options>
<static-discovery name="primary" protocol="${jboss.domain.master.protocol:remote+http}" host="172.17.31.177" port="${jboss.domain.master.port:9990}"/>
</discovery-options>
</remote>
</domain-controller>
So the slave host could use the authentication information we provided in 'ManagementRealm'.
Now everything is set for the two hosts to run in domain mode. Let's start them by running domain.sh on both hosts. If everything goes fine, we could see from the log on master:
That means all the configurations are correct and two hosts are run in domain mode .
Step 4:
Deployment
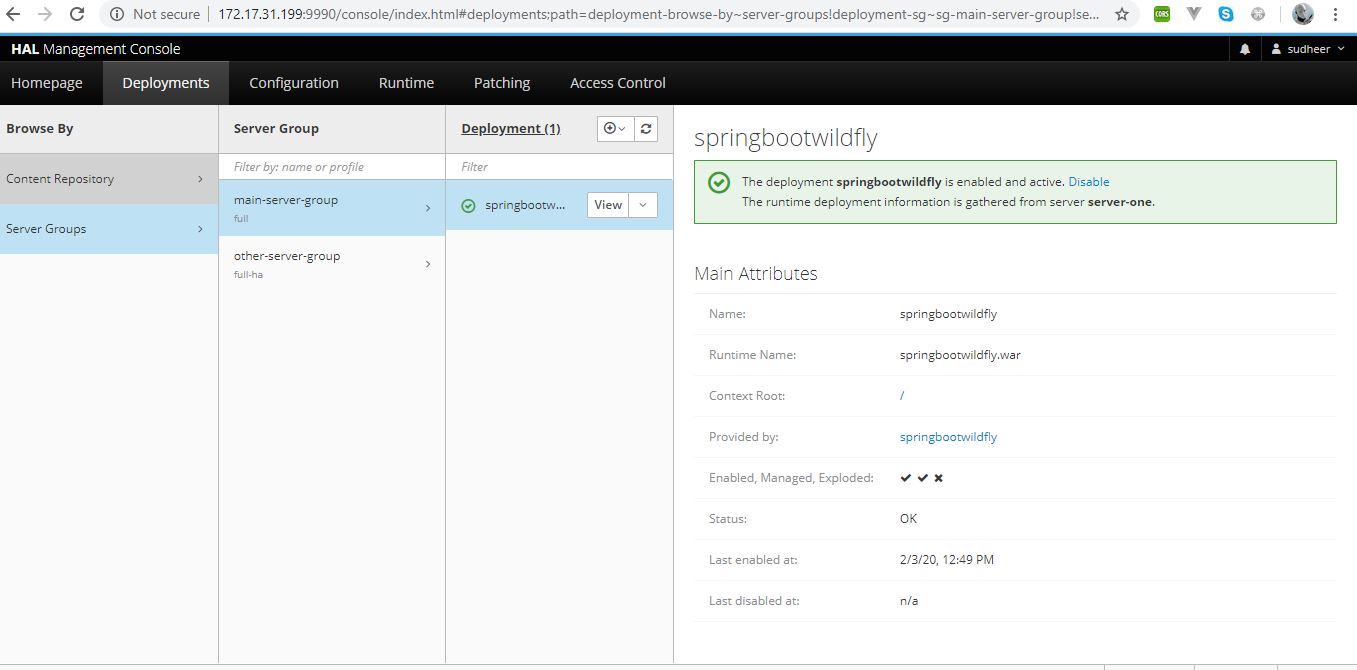
Now we can deploy a demo project into the domain. I have created a simple spring boot project.
Goto deployment tab in admin console.
And choose what server you want and simply click on deploy link and upload the spring boot project into admin console.
we should satisfy all wildfly restrictions for deployment structure of spring boot app.after that it will deploy successfully.
And choose what server you want and simply click on deploy link and upload the spring boot project into admin console.
we should satisfy all wildfly restrictions for deployment structure of spring boot app.after that it will deploy successfully.
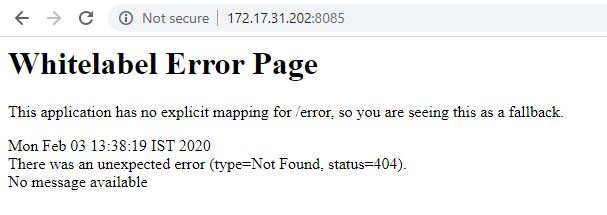
In slave side that admin console is disabled because ,slave doesn’t have deploy option.it simple shows the below message.
You may not access the admin console on this node,all access must via master host controller.

Now slave also have right to access the deployed application in admin.
It’s be like :
Here 172.17.31.202 is slave ip address.
Step 5:
Cluster Configuration
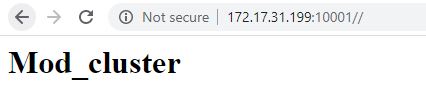
We will use mod_cluster + apache httpd on master as our cluster controller here.
Because WildFly 18 has been configured to support mod_cluster out of box so it's the easiest way.
Because WildFly 18 has been configured to support mod_cluster out of box so it's the easiest way.
First download the Apache24 for httpd.
Goto /bin folder and open httpd in admin mode. After that run the command httpd -k start .
It’s shows below screen.
It’s show “it works” message in place of mod_cluster.
After that we need to download mod_cluster . and copy the below .so files and paste into Apache24 modules folder.
LoadModule advertise_module modules/mod_advertise.so
LoadModule manager_module modules/mod_manager.so
LoadModule proxy_cluster_module modules/mod_proxy_cluster.so
#LoadModule proxy_cluster_module modules/mod_proxy_balancer.so
LoadModule cluster_slotmem_module modules/mod_cluster_slotmem.so
And add below code in last of httpd.config file.
<IfModule manager_module>
ManagerBalancerName mycluster
<VirtualHost 172.17.31.199:10001>
<Location />
Require all granted
</Location>
ServerAdvertise On 172.17.31.199:10001
AllowDisplay On
KeepAliveTimeout 300
MaxKeepAliveRequests 0
AdvertiseFrequency 5
AdvertiseGroup 224.0.1.105:23364
EnableMCPMReceive
AllowDisplay On
<Location /mod_cluster_manager>
SetHandler mod_cluster-manager
Require all granted
</Location>
</VirtualHost>
</IfModule>
After that run httpd -k start command.it shows the below message in browser level.
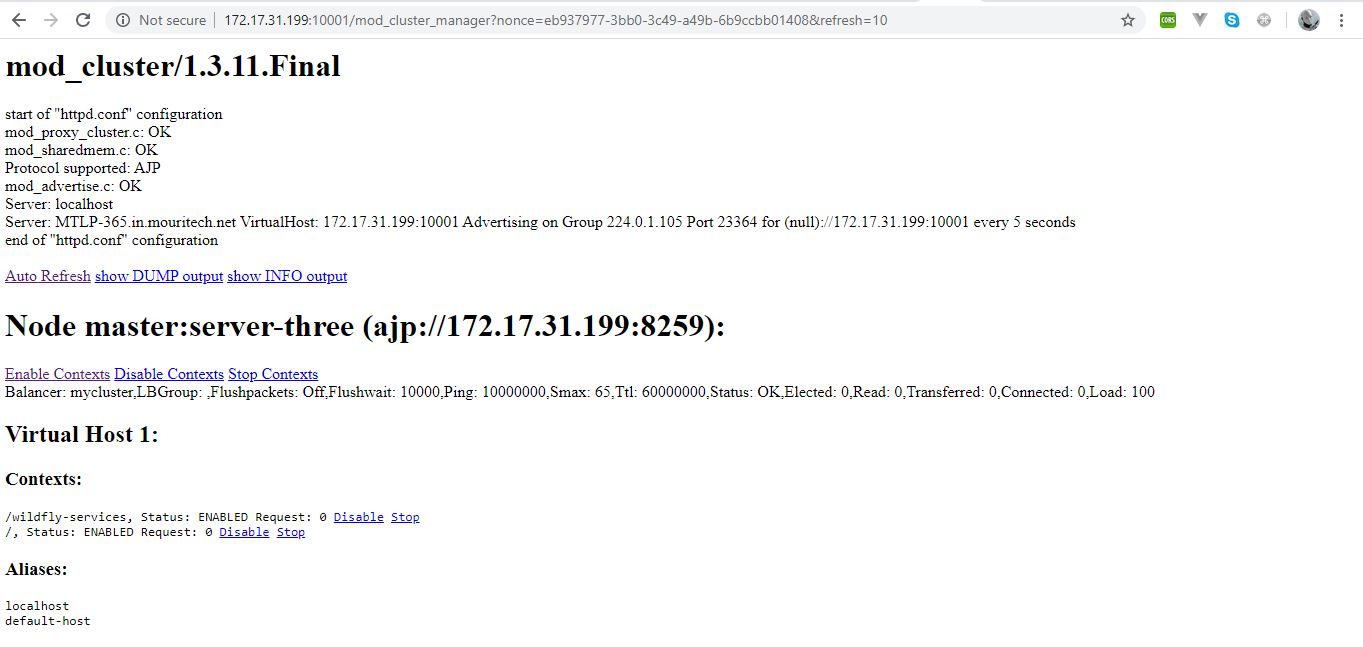
Now master and slave both are connected with mod_cluster.
Now we access the our deployment application in mod_cluster url be like below screen.

After that hit the base url for our application be like below screen.
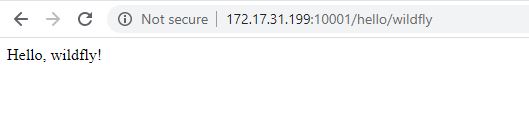
Now both master and slave work under the mod_cluster url.
Comments
Post a Comment